DIY Lift-The-Flap Fall Board For Young Toddlers

Lift-the-flap books have more than likely come into your lives over the past few months with your little bookworms who love any kind of interactive book.
As a young toddler they love to touch, explore and have anything in their hands to see what they can do.
Lift-the-flap books are fantastic as they allow our toddlers to lift up the flaps to see what’s hiding underneath. See our favourite lift-the-flap books here.
They are also seen as a form of peekaboo which is one of their ‘go to’ games.
On their daily rampage of the house to see what they can grab next, you may have noticed that their wet wipes are normally a clear favourite.
The opening and closing of the lid is highly satisfying for them whilst at the same time being a great fine motor activity.
Even learning this new skill of how to open a lid isn’t as easy as we all think and takes lots of concentration.
Have you noticed yet that the wet wipe lids are perfect to be used as flaps in your very own DIY lift-the-flap board which our little ones are GUARANTEED to love!!
Follow the super simple steps one how to make this lift-the-flap board that can be used to reveal Fall objects; pumpkin, leaf, apple and acorn in this case.
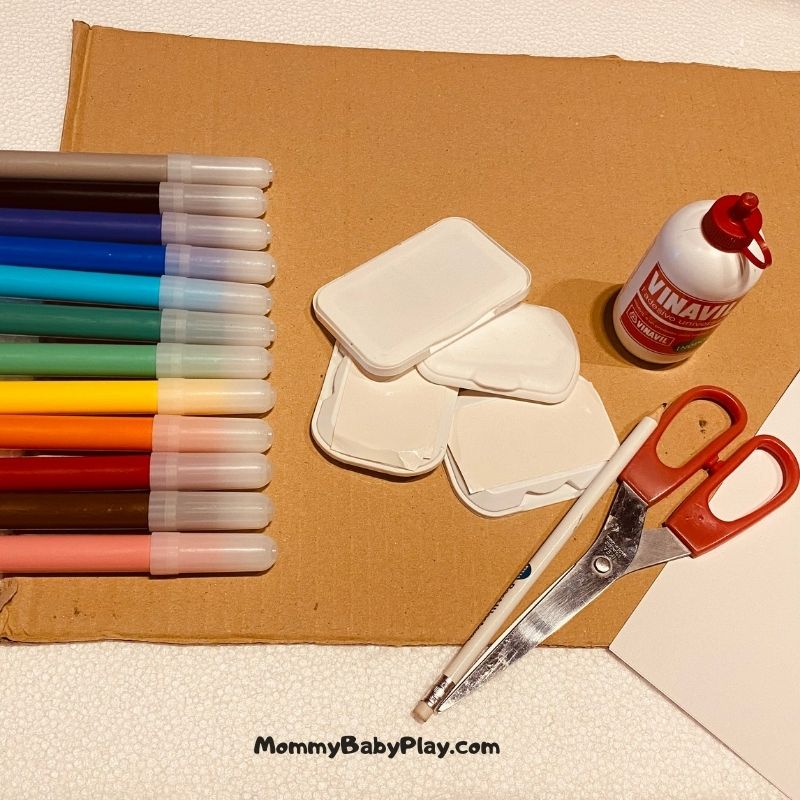
Tools Needed:
- A4 (roughly) piece of cardboard
- Plain paper
- Glue
- Pencil
- Coloured pens
- Scissors
- Wet wipe lids (as many or as little as you like)
Step 1:
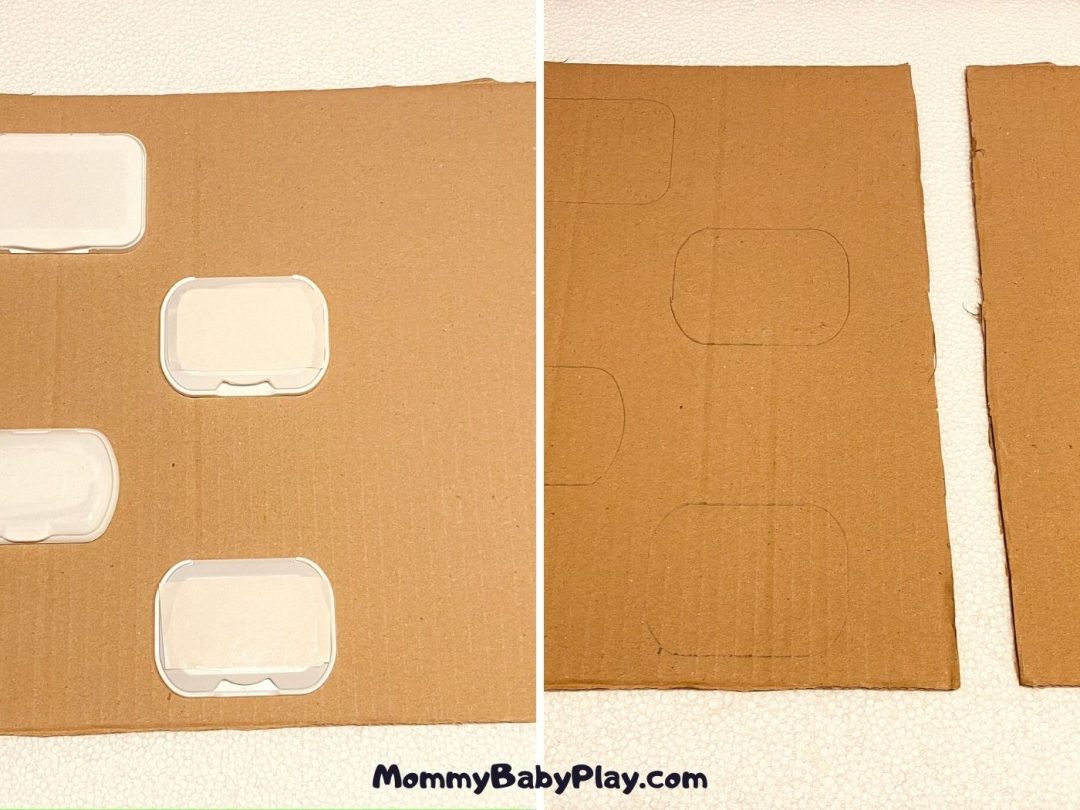
Using the wet wipe lids, decide where you would like them to be placed on the piece of cardboard and using a pencil draw round the outline of the lids when decided.
You may want to cut the cardboard also if you want you lift-the-flap board to be slightly smaller than the piece you have.
This will give you a good idea of the final design.
Step 2:
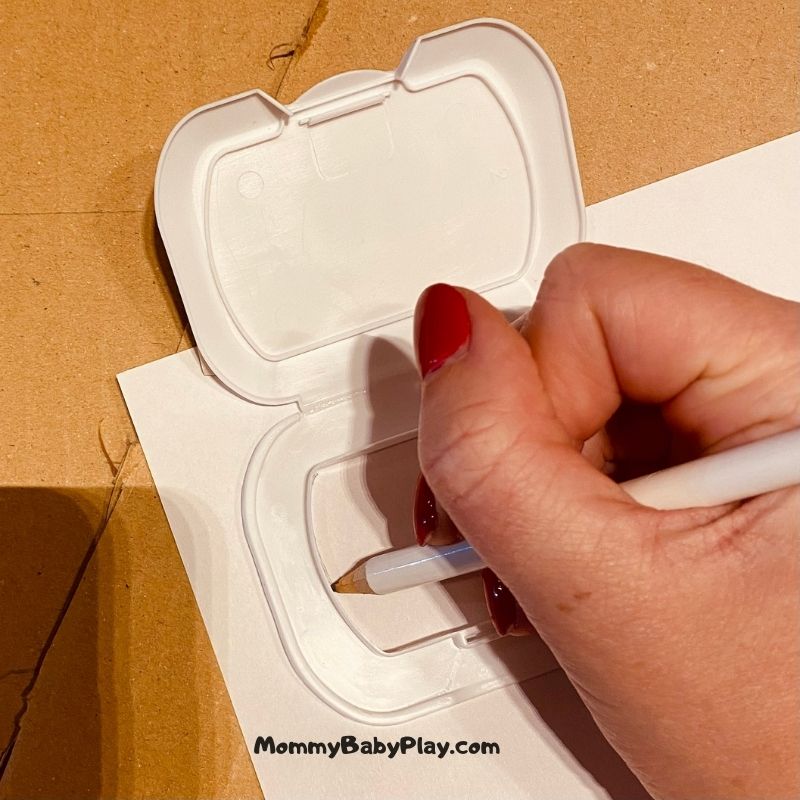
Place the four wet wipe lids on a plain piece of paper and open the lids up.
Draw round the inside of the lid base with a pencil so that you have the correct size to draw or print images for each flap.
Step 3:
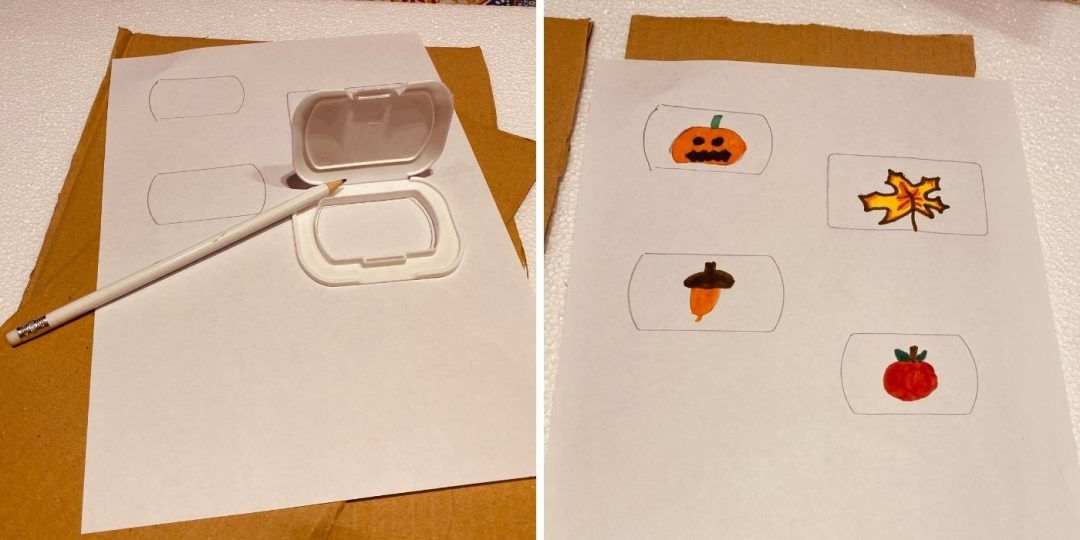
The templates will be ready to start drawing inside.
I would recommend drawing your fall objects before cutting to prevent any difficulty and confusion with the small pieces of paper.
Mummy admission: I am absolutely not any kind of Picasso (proof in the drawings below ), however its the effort that counts right?!
You could either draw or print images for under the flaps.
Even better why not use our DIY Pumpkin Puzzle FREE downloadable template !
Step 4:


Cut out your drawings or print offs for underneath the flaps and place to one side for the moment.
Take the glue and spread plenty covering the flap shapes previously drawn on the cardboard.
One by one place the wet wipe lids on the cardboard in the desired glue covered area.
Be careful not to close the lids before putting the images inside to prevent the lids becoming glued shut.
Step 5:
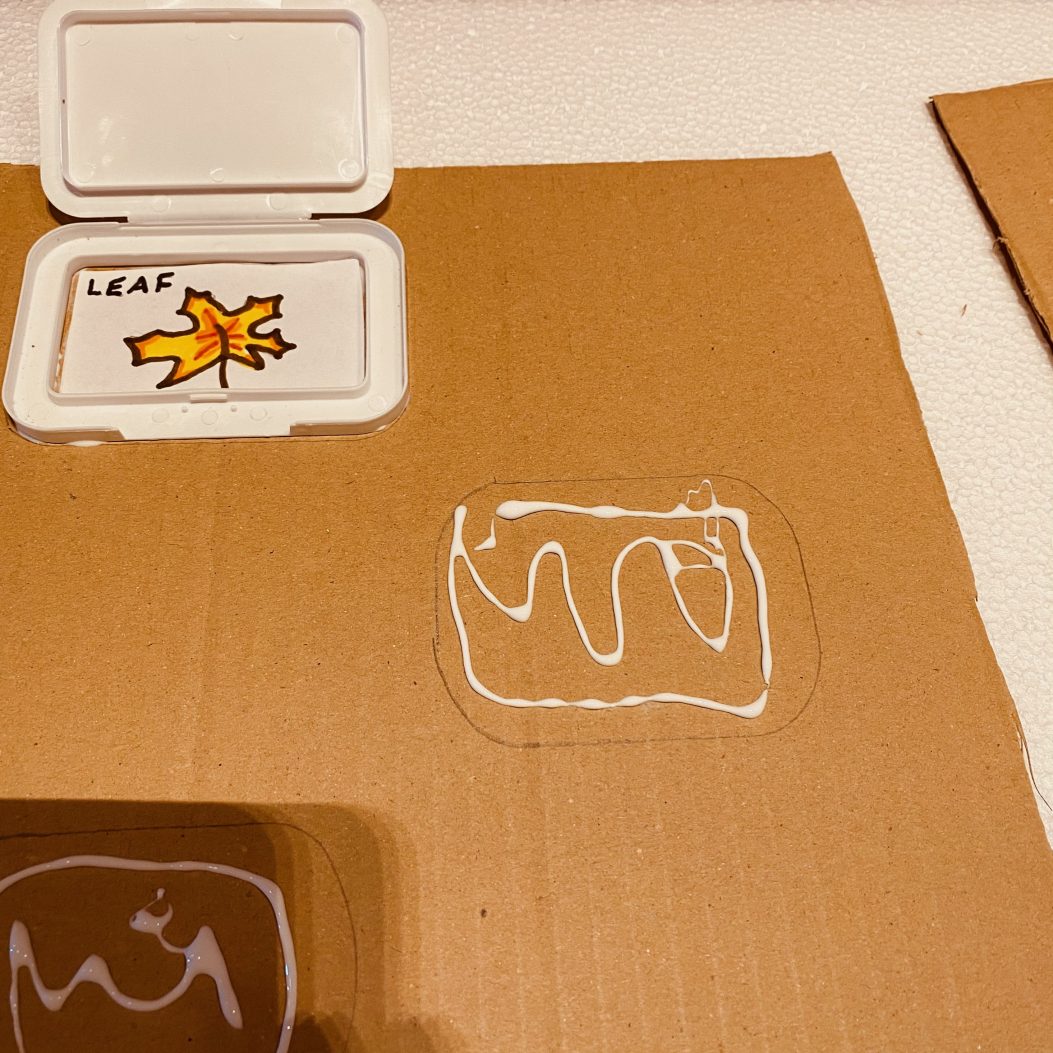
Place each drawing or printed image inside the flaps and leave the glue to dry for a short while.
It is important to allow the glue to dry before letting any curious little toddlers hands free on the activity.
Step 6: The End Result & Time To Play
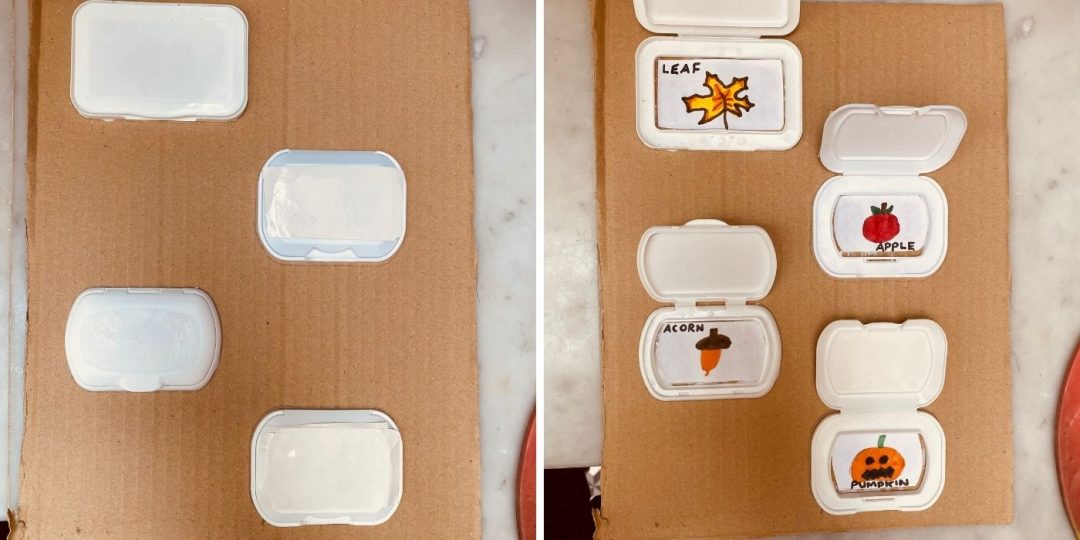
The best part = seeing our little one’s faces when they discover what is under each flap.
This lift-the-flap board can be created in many different ways and instead of going for a Fall theme you could also try;
- Other seasons (Winter, Spring, Summer)
- Animals
- Vehicles
- Photos of family members
Pin this for later!

If you are feeling creative and want some more fall activities to be doing with you little ones you’ll also love these!



One Comment