Sticky Pumpkin Activity & Craft

There’s more than just a couple of reasons to love this simple pumpkin activity and craft.
Sticky Pumpkin is super simple, easy and cheap to set up!
It’s a 2 in 1 entertainment with lots of learning and exploration.

Young toddlers will enjoy the activity sticking yarn and pumpkin seeds to the sticky contact paper while older toddlers and kids will love the actual process of preparing the activity.
It’s a great sensory activity that has lots of language learning opportunities. Exploring sticky surface, fluffy, soft yarn, smooth oval shaped pumpkin seeds.
Your little one will also learn what’s inside a pumpkin. You can even set up real pumpkin guts next to this to compare and match the findings.
This pumpkin craft can be easily turned into a counting activity – count pumpkin seeds for example.
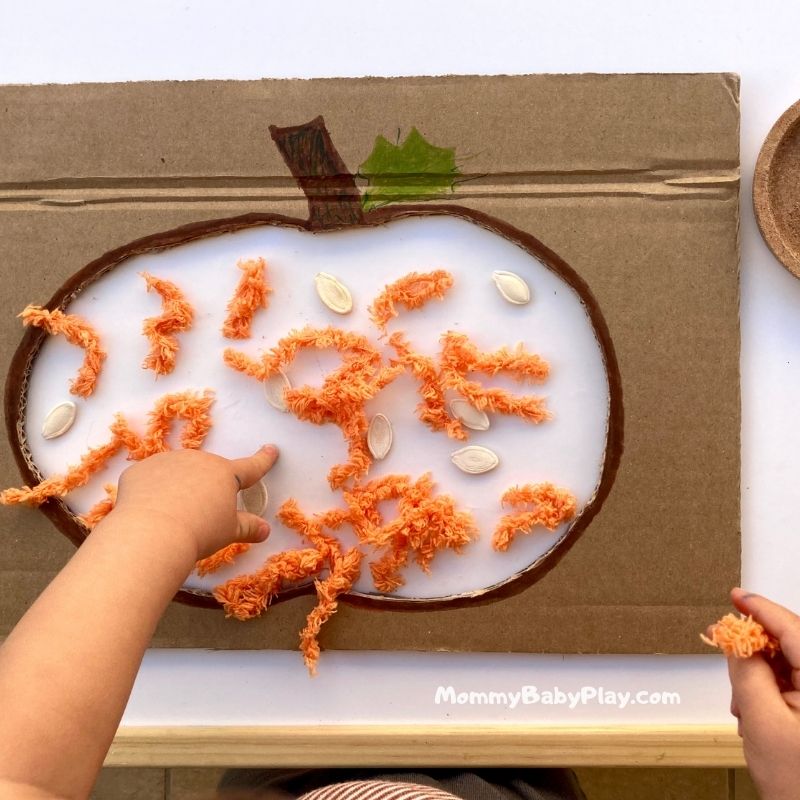
Once you’re done with the activity use it as a fall decoration. Your little one will be proud of their creation.
OR
Remove old contact paper from the carton, cut out a new piece, stick it back to the cardboard and repeat the activity.
I’m definitely going to save the carton with the cut out and my ugly design to do pumpkin activities next year LOL.
Sticky Pumpkin Activity & Craft

Set Up: 5 min
Use: multiple times, see tips & tricks
Age: 12 months +
How To Make Sticky Pumpkin
Supplies:
A piece of sturdy cardboard at least 11″x15″ – but you can easily go bigger than that
Transparent Con-tact Paper – slightly smaller dimensions of that of a cardboard
Color markers
Orange Yarn or Orange Tissue Paper
Pumpkin Seeds
Painter’s Tape (optional)
Instructions
On a sturdy piece of cardboard, draw a freeform pumpkin shape including the stem and the leaves to your liking.
You can use pensil first and once happy with the result use a brown marker to highlight the borders.
Cut out just the pumpkin shape (don’t touch the stem and the leaves) of a cardboard using your craft knife.
Define even better pumpkin shape, stem and leaves with color markers.
Cut a piece of contact paper slightly smaller size than the cardboard. Remove the protective backing and stick it sticky side down to the back of the cardboard.
The contact paper will stick to the cardboard and hold in place.
In the cut out pumpkin opening you’ll have a stricky space for decoration.
That’s it!
Your sticky pumpkin is ready for fun.
You can set up this on the table but keep in mind it’ll be wiggly.
I suggest to fix it with painter’s tape on the table or as an alternative to fix it with same painter’s tape on the wall.
Place orange yarn cut in strings and pumpkin seeds in small bowls and set them up next to the sticky pumpkin.
Show your toddler how to use it and let them explore.

TIPS & TRICKS
I used orange yarn for this activity but you can easily use tissue paper or even regular color paper cut in stripes or whatever else you have available that can fit the purpose.
Remove old contact paper from the carton, cut out a new piece, stick it back to the cardboard and repeat the activity.
Let us know if you try this activity and how you like it.
Pin it for later!
Happy Playing!


One Comment